
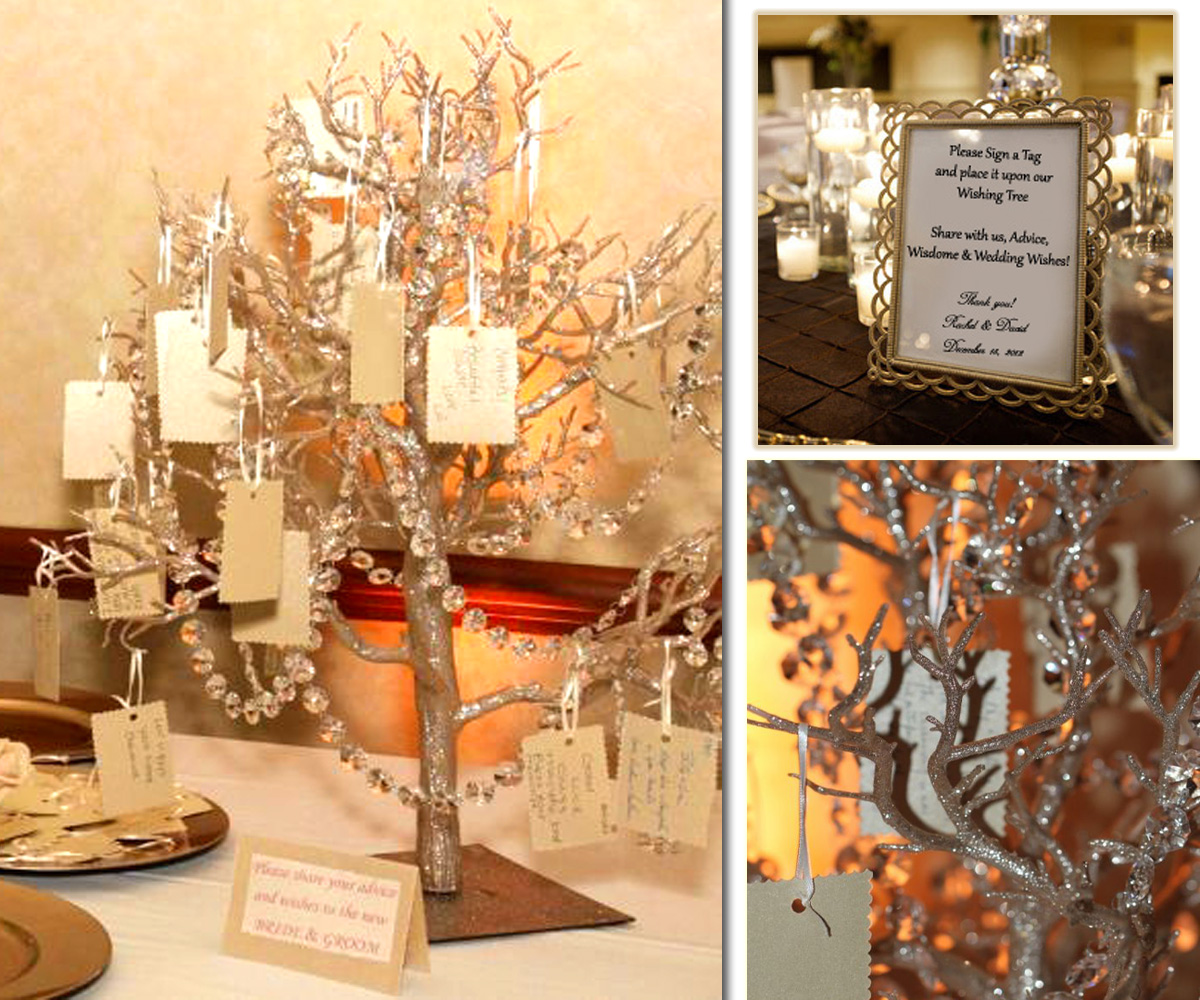
 Are you looking for a small way to make your wedding stand out? Instead of a tradional guestbook, try a Wishing Tree. With origins in Holland, guests write their well wishes for the couple on small pieces of paper and hang them on a tree with string or hooks. The tree can be customized to fit any theme and color to blend in with the rest of the reception space. You can order an already made wishing tree from several sites or you can save a few dollars and make it yourself! Check out the step by step instructions below.
You Will Need:
- Bare tree branches (e.g., manzanita, mitsumata, etc. – about 3 to 4 feet in height) – look in your backyard for some tree branches, too! You can use one large branch or several smaller ones.
- Tree planter (vase, box, or pot large enough to hold the branche(s) and goes with your wedding theme)
- Craft cement. If you are using a glass vase, then you can use clear or colored marbles/rocks as the anchor.
- Floral Foam (for stuffing the tree planter. Foam not needed for glass vases).
- Blank business-sized note cards
- Thin ribbon - for haning the note cards
- A nice tray to hold the blank wish cards AND pens
- Fresh flowers - 1-2 bunches of flowers for flower bed covering (depending on type of flower you are using).
- Clear fish wire or glue gun (optional) – if you want to attach a few flowers to some of the branches.
- Colored cardstock (in your color theme) and glue stick (optional) – to make a Wish Tree instructions sign.
Instructons:
- Place branch(es) in planter or vase.
- If you are using clear vase, then fill the vase with heavy rocks, marbles, etc. Make sure the branches are stable. You can lean the branches diagonaly on each side of the vase for better stability.
- If you are using a solid planter, fill a quarter of the base with cement to set the branch in it’s position. fill the rest of the planter with floral foam, leaving about 1-2 inches of space from the top of the planter.
- Fill the planter with water to ensure floral foam soaks up the water. Do NOT fill water all the way to the top of the planter, as you will spill the water when you transport it.
- Cut your fresh flowers down (at an angle) leaving about 2 inches stem.
- Stick your flowers into floral foam, covering the entire base to make the flower bed.
- TIP: Water your foam everyday to ensure foam has water to feed your flowers!
- Cut colored paper into business size cards and punch hole on left side.
- Cut ribbon about 14″ long and tie around punched hole. You can tie the loose ends together or have your guests do it when they hang their card.
- Optional – If you would like to add flowers to branches, cut flower down to it’s base and simply glue or tie single flowers onto branch with glue gun or fishing wire. Do this as last as possible, because your flowers on the branch will not have any water source and may wilt by the end of the day, depending on the type of flower you use!
- Optional - To make your Wish Tree instructions sign, print out the following message (you can change wording if you’d like) on your cardstock and glue onto another cardstock of your theme colors.
————————
Wish Tree
Please use the provided tags to leave a note for Bride name & Groom name.
Then hang your note on the tree!
Need some inspirations?
- Words of wishes
- Marriage advise
- Memories of your wedding
- Draw a picture
Have FUN and don’t forget to sign your name!!!
Send us some pictures of your wedding wishing tree! We would love to see them!
Source: http://signaturek.wordpress.com/2009/07/20/diy-wishing-tree/