DIY

#WeddingWednesday: Fall Outdoor Wedding Tips and Ideas!

Fall is just around the corner and that means bonfires, apple cider, pumpkins and yes...pie! Fall colors are gorgeous and make it a great season for an outdoor wedding. Here are some fun creative ways to incorporate some of your favorite fall festivities into your big day! I don't know about you but when I think Fall I think pumpkins and hayrides. Orange might not be your fist choice for decor so consider painting or even decorating pumpkins to add that fall feel to the scene. Switch things up a bit by getting rid of traditional ceremony seating and going instead with hay barrels. As beautiful as an outdoor wedding might be we all get a little chilly after a while. Help guest combat the cold by offering blankets to keep them warm. If you really want to heat things up bonfires are the way to go. They will get your guests warm in no time and can actually be quite romantic. And if you do choose to have a bonfire then its only right that you have s'mores! Pre-made kits make the cutest favors! If your venue doesn't allow open pits of fire or if you just don't have the extra space you can still have a s'mores bar. Just use small burners to roast the marshmallows. Its a great substitute for a sweets bar. Speaking of sweets; instead of going with the usual cake for dessert try offering up some fall flavored pumpkin and apple pie. painted pumpkin Hay seating

blanketsBonfiresmores kit Smores bar roasted mmpiePumpkin name cards apple namecards apple candlesBeer barrel


A Picture Perfect Graduation Party!

future-graduation-party Inspired by nostalgic moments & the promises of a bright future, Do Driver of Piggy Bank Parties styled this creative “Picture Your Future” Graduation Party with Polaroid & photo album decor! The adorable “yearbook” party favors and “Sweet Memories” photo garland are such great graduation party ideas… they get an A+!

PARTY HIGHLIGHTS to look out for:

– Cute Polaroid inspired banner + tissue “graduation tassel” garland – “Yearbook” favor boxes filled with the graduate’s favorite chocolate treats – “Sweet Memories” photo banner and graduation “photo album” guestbook – Varsity letter brownies & Chalkboard inspired printables


graduation-party-ideas graduation-party-drinks sliders slide-bar hamburger-toppings veggie-fries graduation-party-yearbook-favors


Graduation is often a time of reflection when photo albums and yearbooks from the past are reminisced over while dreams of what the future holds are ever present. This graduation party design was inspired by the magical Polaroid photographs of yesteryear and the slides you’d see projected on the white wall of your grandparents’ basement!

10 Romantic Ways To Propose For Under $100

unnamed (3)It has been said, "when you know, you know." And if you're a man and reading this blog then that must mean you're ready to POP the question. However, there's a lot more to it then just dropping a whole lot of dough on a ring. You will need a proposal, and not just any proposal, one that will knock her socks off. One she'll be telling your grandchildren about like it was yesterday.  Have you been tossing and turning while thinking of the perfect way to propose? Don't fret.  There's certainly not a lack of information out there to assist you in planning and executing the task at hand. But if you're looking for a few ideas that won't break the bank here are some way to propose for under $100,

Proposing ideas for $100- $50

  • Arrange a surprise proposal with a street caricaturist. Have him sketch a picture of you two with word bubbles. Yours will read, "Will you marry me?" and hers will say, "Yes!" This is a very cute idea and from the research I've done it would be roughly $75-100. And you'll have something to frame to commemorate this exciting event.


  • Make the box holding her ring a selection on the dessert tray at your favorite restaurant. Well, I'm going to assume you're not taking her to a hole in the wall down the street but a fancy intimate place. I mean, if they have a dessert tray, you know it's going to be a little pricey, $75-$100 easy. Of course you'll have to order some champagne, which will add a few more dollars to the grand total.


  • Gather your families together for a barbecue and make it a family affair. This proposal can range from $50 to $100 easy but it will be an event the whole family will be thinking about for years to come. A way to cut costs- make it a potluck and have family members bring a dish.

Proposing ideas for $50- $15

  • Slip the ring on her finger while she's sleeping and wake her with champagne and strawberries. At first, the gesture will simply seem romantic -- the real surprise comes when she notices her new piece of jewelry. A nice bottle of champagne is about $12-23 and you can get chocolate covered strawberries at Publix or your local grocery store for about $2 each. $47ish


  • Propose in a flower or botanical garden when everything is in bloom. Depending on where you live, a botanical garden roughly cost $12-20 dollars a ticket. If you take her there while everything is in bloom $40 will seem like a good value- make sure to bring your camera.


  • Go out for a night of dancing and ask the DJ or bandleader to pass you the mic so you can dedicate a song and propose on the dance floor. Talk about shock and awe! You can expect to about $10 a person to get into any busy club, so about $20 total, but one unforgettable proposal!


  • Spell your proposal out in glow-in-the-dark star stickers on your ceiling. Get into bed, turn the lights off and wait for the inevitable gasp. I took at look at Amazon and found these stars online for about $15 because I had no idea where you'd purchased them otherwise. Quick things to keep in mind however, make sure she's not there when the package is delivered. A girl always has to know what's in the box.

Free ideas for proposing:

  • Play hangman and have the phrase be "Marry me." Pencil plus paper equals free.


  • Go to the beach and casually build a sand castle  and place the ring on the highest turret. Then invite her to admire your handiwork. It doesn't cost anything to go to the beach, just remember to bring sunscreen. Free


  • Scrape your proposal into the frost on her car's windshield (winter)- Free

Then be sure to contact us here at Favored by Yodit Events so we can help you plan the wedding of her dreams!

Source: fdleventconsultingblog.com

In Full Spring: Easter Egg Decoration Ideas

Easter Egg - Blue Bow Decorating Easter eggs is one of the most popular activities when it comes to celebrating Easter. Easter eggs are party of the celebration for kids as they often participate in Easter egg hunts. However, Easter eggs are often just a pretty decoration that work their way into lovely holiday centerpieces and other arrangements.

Here's the trick for Easter egg decorating: use an old-fashioned rubber band. You'll actually want many of them!

Before dyeing your Easter eggs, secure a few rubber bands of varying widths around each egg. The result? Patterns of perfect white bands around your eggs. Try to shift the position of the rubber bands to achieve different patterns.

Easter eggs

Though the striped patterns on each of your Easter eggs will be different, the simple mixture of bright Easter colors and white stripes will serve as a lovely unifying design theme that keeps your Easter activities aesthetically pleasing.

Easter Egg - DIY

Another idea for Easter eggs is decoupage. Make a simple mixture of glue and water, and paste your favorite magazine or newspaper clippings to the outer surface of each egg. Talk about unique Easter eggs! The end result is a sophisticated, polished and antique look that will impress all of your Easter Sunday guests.

Easter egg decorations

No matter how you decorate your Easter eggs, be sure to make time for fun in your Easter activities! Find more inspiration for your easter egg decorating below.

Source: Punch Bowl

Tip Tuesday: 15 Cheap Wedding Ceremony Decoration Ideas on a Budget

Whether your wedding is in a big, elegant church, or a rustic, old garden, or at a white, sandy beach, the backdrop and decorations of a wedding ceremony can really make a lasting impression. And luckily, a pretty ceremony doesn't have to cost a fortune. When it comes to ceremony decorating, less tends to be more. Additionally, you can save some money by being creative and keeping it simple. Here are 15 ideas for decorating your ceremony while sticking to your budget.

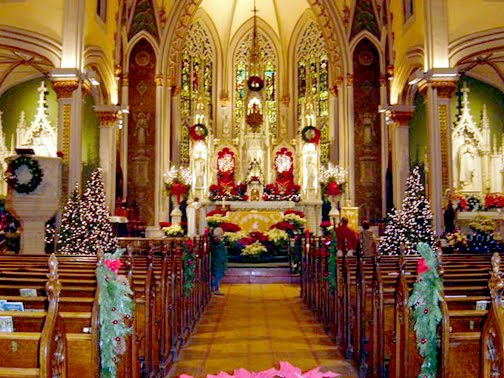
Save Money on Ceremony Decorations at a Church

1. Use Your Venue’s Decorations If you’re getting married in a church, see what decorations they have for you to use. Many have candelabras which can add sophistication to your ceremony. Also, you may not have to decorate at all if you plan to get married during Christmas or Easter time when churches are already adorned with flowers and greenery.

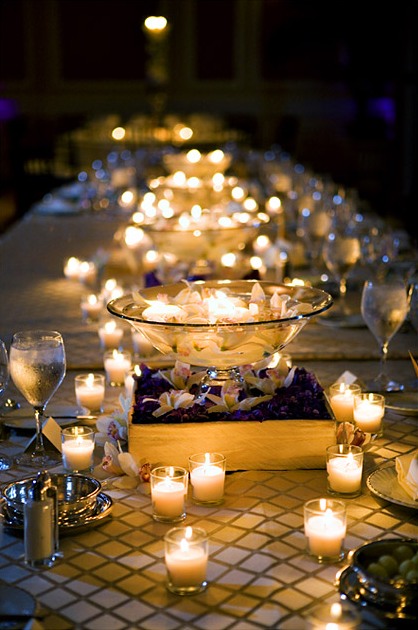
2. Use Candles Instead of Flowers 
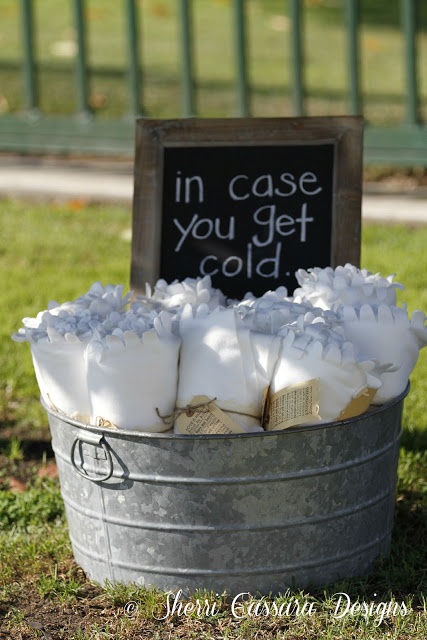
Candles are a lot cheaper than wedding flower arrangements, and can often be more romantic. Use them at the altar, to line the aisle (make sure they’re in fireproof bags or enclosed in glass to prevent fire hazards), or even in place of bouquets.

3. Get Some Potted Plants In the royal wedding of Prince William and Kate Middleton, they lined the aisle of the beautiful Westminster Abbey with big, potted trees creating an English garden atmosphere. You can do something similar by bringing some potted plants from home or borrowing a few from a friend.

4. Buy Lots of Tulle There are so many fun things that you can do with tulle to decorate, but here are two of my favorites. The first thing you can do is create a canopy effect with the tulle. Have a few friends hang some from the center of the ceiling and then drape it down to the corners of the altar or stage. To complement the tulle canopy, use tulle to make bows to put on the pews or rows of chairs.

5. Decorate the Altar Only If you have a beautiful wedding venue already, there is no need to go overboard with your decorations. Perhaps all you need is a simple arrangement at the altar.

6. Decorate Your Own Unity Candle This is a fun and easy project that can be done in less than one hour. Go to a craft store and buy a plain, white candle that is at least two inches in diameter. You will also need to buy a ribbon (at least two inches wide) and some sequins. To assemble your own unity candle, glue the ribbon around the bottom of the candle and then glue the sequins on the front of the candle so that they spell the first letter of the groom’s last name.

7. Go Shelling                                                                                                                                                                                   If you live by the beach and have access to free shells, put them in clear vases or hurricanes to be used as wedding decorations. Although shells would be a great addition to a wedding near the ocean, they would also be a beautiful added surprise to a landlocked wedding as well.

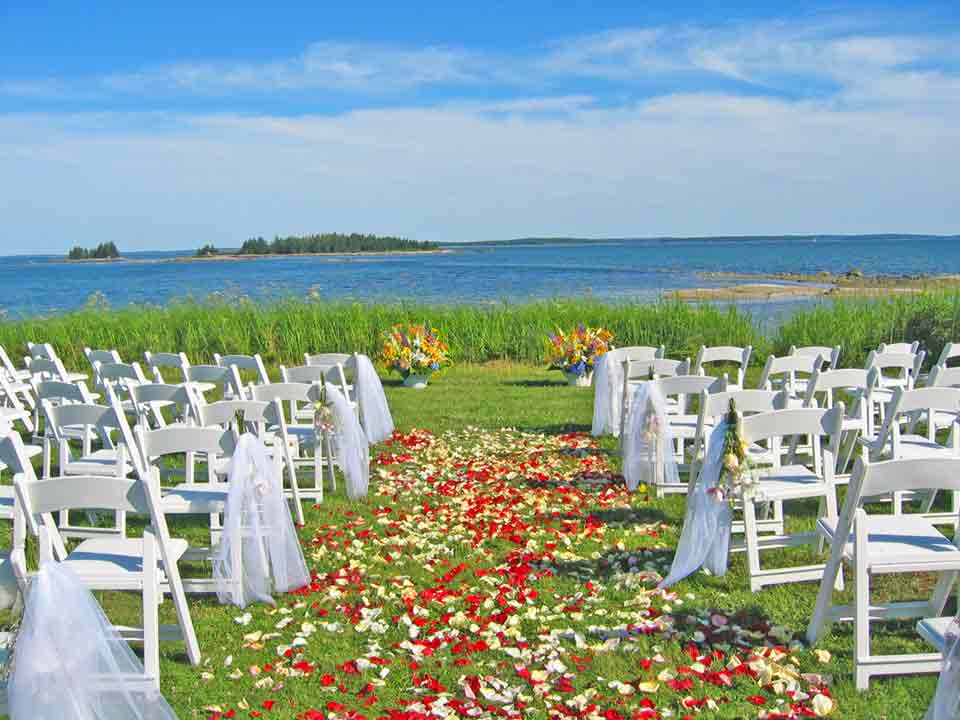
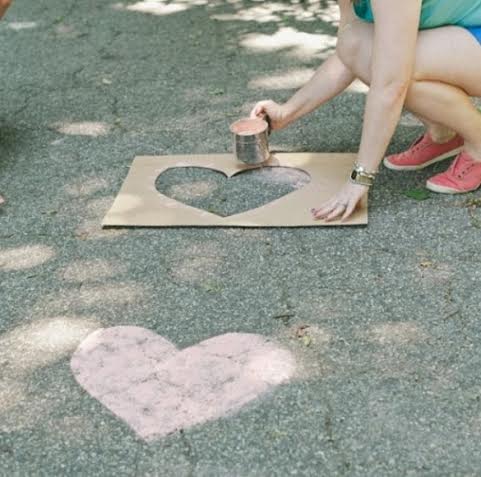
8. Throw Down Some Flower Petals Even if you do not have a flower girl, you can still throw down some flower petals along the aisle. This can be done as part of the decorating process before the guests arrive. Flower petals are inexpensive to buy compared to actual flower arrangements, so if you really want flowers but don’t want to spend the money, this is a great way to add them into the decoration of your ceremony.

Save Money on Ceremony Decorations Outdoors

9. Pick a Naturally Beautiful Setting Outdoor garden, beach, or mountain weddings are already decorated for you. For example, if you’re getting married at a farm, throw down some hay bales for seating and you’ve got a rustic, but romantic aisle to walk down. If you want a garden wedding, make sure you get married in the spring when all the flowers are in full bloom.

10. Have a Focal Point There needs to be some sort of focal point that you and your spouse-to-be meet at to be wedded. The focal point will act as a frame around the event. Some of the most common options are arches and gazebos. First check to see if you will have one provided to you by your venue. If not, you can buy one, rent one, or make one. Unless you are a carpenter or a handyman, you should probably opt to rent one. I suggest renting an arch since they are typically cheaper than gazebos and look just as nice.

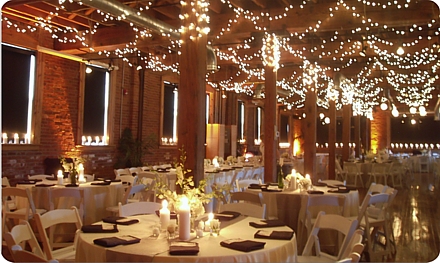
11. Hang Some Christmas Lights If you are getting wed in the evening, white Christmas lights are a must. And if you’re renting an archway, it would be the perfect place for the lights. Also consider hanging lights in some of the trees if you will be in an outdoor setting.

12. Mow the Lawn This may seem obvious, but if you are getting married in a backyard, start working on the lawn early to ensure that it will be ready in time for the big day. If the yard is kept up with regularly, it will look better for the wedding. Also, start early to plan out what flowers and plants you want to feature. Planting bulbs months in advance will save you from buying more expensive flowers to plant the week before the wedding.

13. Use a Theme to Guide You I went to a wedding not too long ago that had an amazing “Zen” theme throughout. Some of the decorations included paper parasols, lanterns, and bonsai trees. They even had rock gardens as the wedding reception centerpieces to complete the theme. What’s great about using a theme is that you only need a few elements to make a big impact on the overall impression of the ceremony.

14. Light It Up 
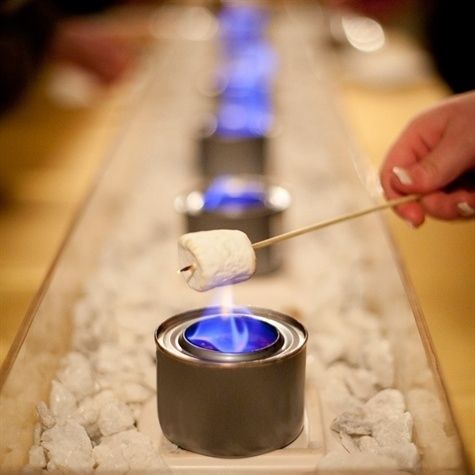
In addition to white Christmas lights or candles, other ways to light up your evening are to use luminaries, torches, and lanterns. Use what is most appropriate given your particular wedding venue. Also, keep in mind whether or not children will be at your wedding and if it would cause any issues to have open flames.

15. Blow Bubbles Although this may sound childish, bubbles can actually add an elegant touch if done correctly. If you’re going to use a bubble machine, make sure that the machine is out of sight and that the bubbles are not coming out too quickly or too slowly. Also make sure that the bubble machine is not too noisy.

The key to successful wedding ceremony decor is simplicity. Clean, elegant flower arrangements, a few strategically placed candles or some potted plants to add a little greenery are all you need to create a romantic and memorable ceremony. Less is more – which ultimately means more money in your wallet.

christmas church wedding wedding-centerpiece-2 tulle Potted plantsseashell-centerpiece

petaled_aisle Christmas_Wedding_LightsHow did you decorate for your wedding ceremony? Were you able to keep the cost of decorations low? Send us pictures of your big day at helen@favoredbyyodit.com

Source: http://www.moneycrashers.com/cheap-wedding-ceremony-decoration-ideas-budget/
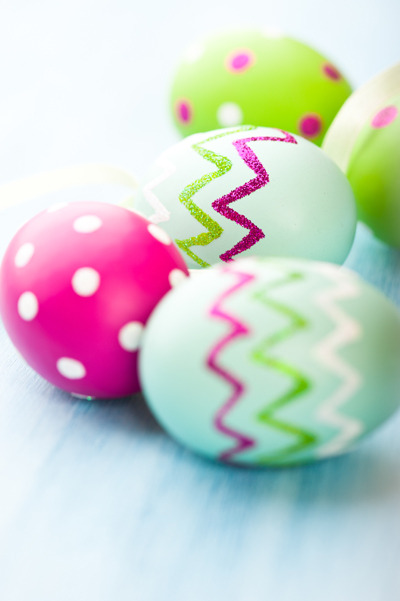
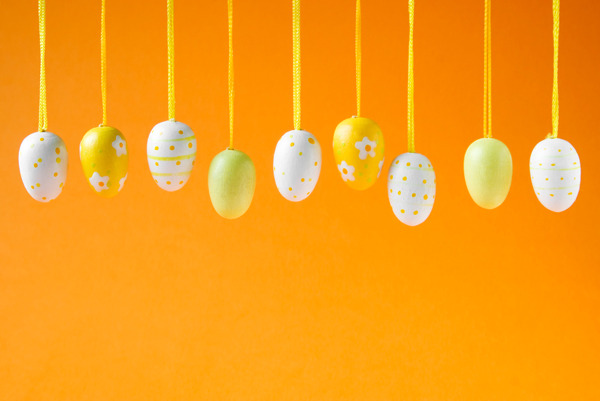
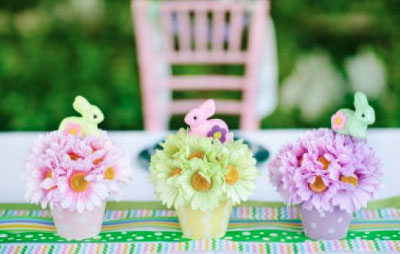
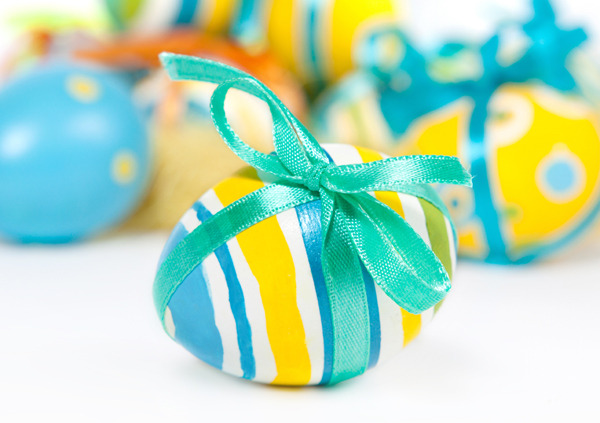
Wedding Wednesday Chalk Inspired Wedding Trends!

Anyone planning on bringing in some chalk details for their day

Chalk walkway chalkboard-styled-04 chalkboard-styled-18 chalkboard-styled-07 chalkboard-styled-10 chalkboard-styled-08


chalkboard-styled-16 chalkboard-styled-17 (1) chalkboard-styled-20


love the idea of incorporating chalk details in your wedding – such a modern + whimsical accent for your day! This super pretty shoot styled by Vintage My Wedding + photographed by Love Is A Big Deal is full of lots of ideas to bring this artistic trend into your wedding. I think it would look perfect for a loft or warehouse venue, right? Love the idea of using placemats instead of guest cards! A chalkboard backdrop allows for lots of fun options! From photo booth backdrops to leaving sweet messages to your dessert table backdrop, the options are endless!

Source: http://greenweddingshoes.com/chalk-inspired-wedding-ideas/

Giveaway: Enter to Win 5 Custom Label Groomsmen Socks from CuteNCrafty

  Wedding Sock Giveaway

We love a good giveaway and were excited when local designer Kendra Barnes of CUTEnCRAFTY approached us about sharing her fun gift for groom-to-be's! CUTEnCRAFTY is giving away 5 pairs of Groomsmen socks on Instagram (@cutencraftyshop) and what better way to stay warm and save money!

Kendra first designed her Cold Feet Socks for her own groom, to ease any of those those pre-wedding jitters on their special day. Everyone loved it and since then, Kendra has offered her items on Etsy as fun day-of gifts. Check them out and get 20% off of your entire order when you purchase 5 or more Groomsmen Socks. Use the code GROOMSMAN at checkout and make sure to follow them for more details and tell them Favored by Yodit Events sent you!

CutenCrafty1

CutenCrafty2


DIY Hot Cocoa Favors & Hot Cocoa Bar Party Inspiration

067

For my 28th Birthday I wanted to do something "sweet" to celebrate with my closet friends and decided to host a brunch & ice skating soiree! Since my birthday is January 21st its always freezing so I wanted to give guest a favor that would keep them warm in the cold! Below are some photographs of the hot cocoa mix favors I made and the easy to do hot cocoa bar at the ice rink for my guest to indulge in at the event.

068

063

I recommend putting out a few different toppings as part of your hot chocolate bar, so that guests can mix and match their favorites. I also used hot cocoa flags to dress up my home made marshmallow and brownie bites which are great when you dip them in your hot cocoa!

066

032

The hot cocoa mix favors were also used as place cards for guest to find their seat :)

007

001

003

Brunch without a signature mimosa is not a fun brunch in my eyes so I was thankful to find that Sequoia Restaurant in DC had a great unlimited mimosa option for my guest to be happy!

Hot Cocoa Collage 1

004

See more photos on our Favored by Yodit Events (Yodit Gebreyes) facebook page here. Make sure to "Like Us"!

Photography by Our Story Photography | Printables by Tom Kat and Party Blog | Styling by Favored by Yodit Events 


signature


Haunted Attactions: DIY Halloween Decor

diy-chic-pumpkin-candle-holders-3 
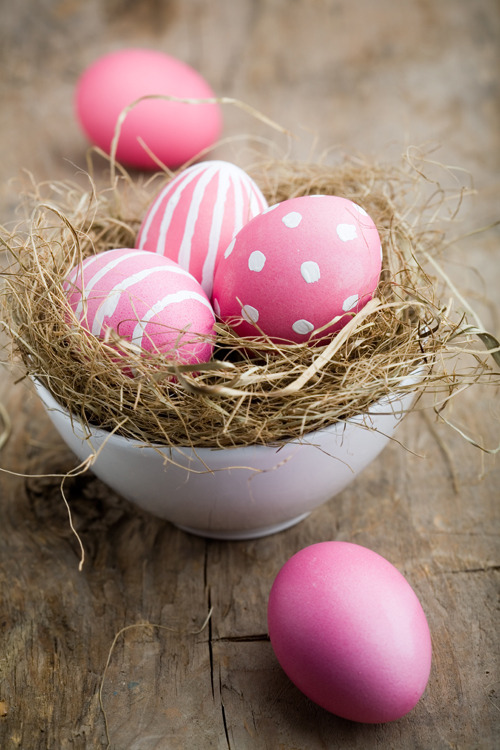
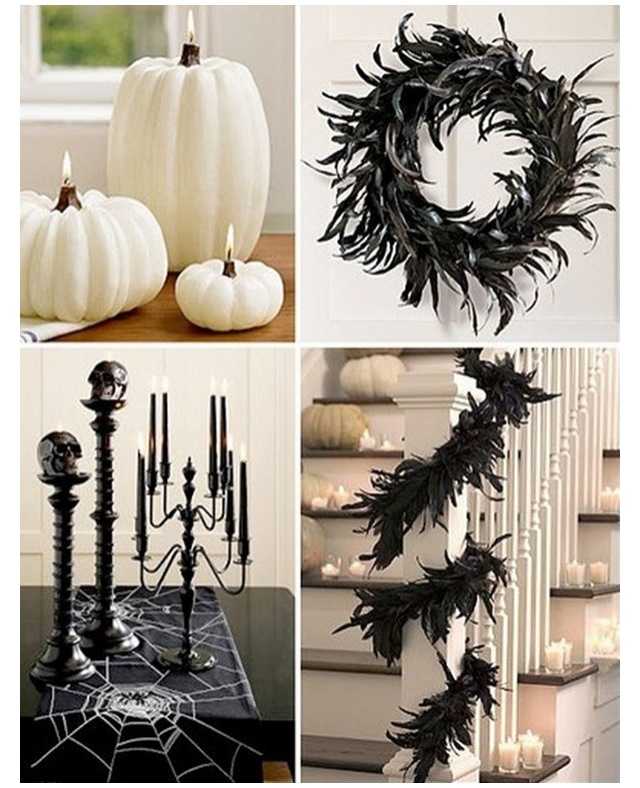
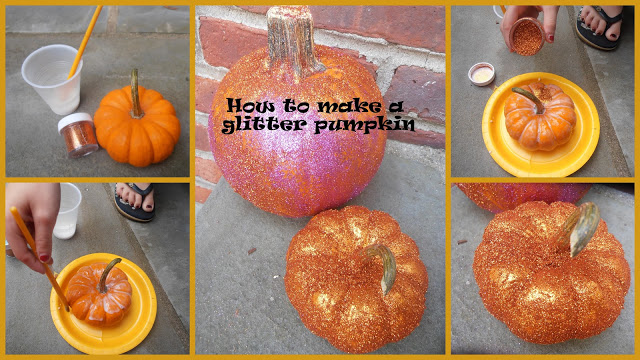
Are you having a Halloween party but don't want to decorate with the typical orange and black scary decor? Class up the party with white and black decor or glitter pumpkins! They are really easy to do yourself and will still make your place look festive even after all of the fun is over. Check out some inspiration below and instructions to make your DIY glitter pumpkins.

glitter blast halloween craft

photo

How to Make A Glitter Pumpkin

Materials:

•A pumpkin (any size)

•Glitter

•Glue (Elmer's works fine)

•Paintbrush

•Cup of Water

 Instructions:

1. Mix the glue with a little bit of water in a cup so that it will be easier to paint on your pumpkin.

2. Paint your pumpkin with glue

3. Gently and carefully cover your pumpkin with glitter. You'll have to turn it a few times to get all the spots. If you need to, add a little more glue to any spots where the glitter doesn't take the first time.

4. Shake the pumpkin to remove any extra glitter.

5. Leave your pumpkin to dry, and enjoy!

Source: http://randomhandprints.blogspot.com/2012/10/31-days-of-halloween-day-14-how-to-make.html


Our October #FavoredBrides #DIY Bridal Shower

IMG_0390

Recently, our October Bride Clarissa had her bridal shower. Her bridesmaids hosted a beautiful DIY tea party and got most of the ideas from Pinterest! If you have been living under a rock and don't know what Pinterest is (lol), it is a social media space where you can share everything from DIY decor ideas, receipes, quotes, fashion, and event inspiration. It is a great medium for ideas if you want your event to stand out but just need a little help. Check out how Clarissa's bridesmaids used Pinterest to make her bridal shower a day she will never forget.

IMG_3646

Nothing says vintage like mason jars. The favors were mason jars filled with cookie ingredients and placed on an old wooden ladder and crate that guests could take as they left.

IMG_4775

Some ribbon, dollies, and colorful straws can dress up any drinking station. Very cost effective and easy to do.

IMG_7705

Staying with the Vintage theme, the hosts used an old briefcase and lace to gather the gifts and cards.

IMG_8367

How cute is this welcome sign? All of these unique pieces add such a nice touch, and can be found anywhere. Start with a Parent's house!

IMG_8434

Instead of using a folding table for the desserts, substitute it for an dresser! Mismatched platters and lace runners add a nice subtle touch.

Save While You Savor: 2 Favorite #DIY Desserts in Jars!

Peach cobbler in a jar 
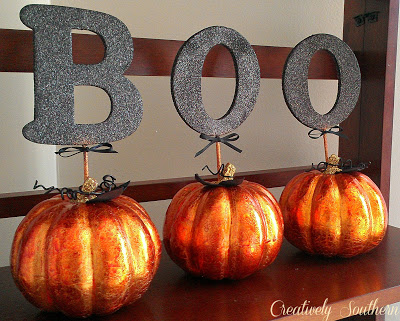
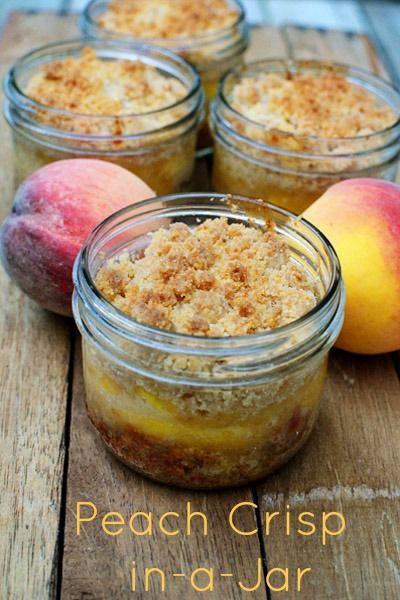
Peach Crisp in a Jar Recipe

Ingredients:

Peach Crisp Filling: 6 fresh peaches, peeled and chopped 1 cup sugar 1/2 tsp. cinnamon 2 eggs beaten Juice from one lemon (I used a lime because I didn’t have a lemon on hand) 1/2 cup of flour

Graham Cracker Crust: 16 graham crackers crushed 6 tablespoons melted butter 2 tablespoons sugar

Crumble Topping: 1 1/4 cups flour 1/2 cup brown sugar 1/4 tsp. salt 1/4 tsp. cinnamon one stick of butter, melted

Instructions: Preheat oven to 350 degrees.

Prepare peaches. In a large bowl, combine peaches along with the rest of the peach crisp filling ingredients. Set aside.

Place crushed graham crackers, melted butter and sugar in a medium bowl and mix thoroughly. Press several tablespoons of the mixture into each jar and press down with a measuring cup. Mix ingredients for crumble topping using a whisk.

Set aside crumble topping. 

Add peach filling to the jars, making sure you leave room for the crumble topping.

Spoon crumble mixture on top of peach filling. If you are planning to add a lid, do not overfill. Place jars on a parchment lined baking sheet and bake for 30-35 minutes on a low oven rack.


banana-bread-recipe-4

Banana Bread in a Jar Recipe  (Makes one dozen 250 ml jars)

Ingredients:

2/3 cup shortening 2 2/3 cups white sugar 4 eggs 2 cups mashed bananas 2/3 cup water 3 1/3 cups all-purpose flour 1/2 teaspoon baking powder 2 teaspoons baking soda 1 1/2 teaspoons salt 1 teaspoon ground cinnamon 1 teaspoon ground cloves (I used half a teaspoon because I didn’t want mine too ‘clovey’.) 2/3 cup chopped pecans or walnuts

You might also need:

12 250 ml canning jars funnel

Instructions: If you are planning on storing these for a while, you will need to sterilize your jars. Preheat oven to 325 degrees F (165 degrees C). Grease insides of a dozen 250ml canning jars. In a large bowl, cream shortening and sugar until light and fluffy.

Mash bananas. Beat in eggs, bananas, and water. Sift together flour, baking powder, soda, salt, cinnamon, and cloves. Add to banana mixture. Add nuts and stir them in with spoon. Insert canning funnel into mouth of jar and pour mixture into greased jars, filling half full. Place jars directly on rack in oven. Do NOT put lids on jars for baking. Be careful to keep the rims clean, wiping off any batter that gets on the rims. Bake for 45 minutes. Don’t worry if a few rise over the top of the jar a bit like this one. You can press it down with the lid.

Note: To be safe, I wouldn’t make these more than a week before your wedding or event. We don’t endorse keeping for long periods because we are not food scientists and cannot speak to longevity canned bread.

Source: All recipes adapted from allrecipes.com


Instant Show Stopper, #DIY Hand Glittered Paper Lantern

glitter paper lanterns 
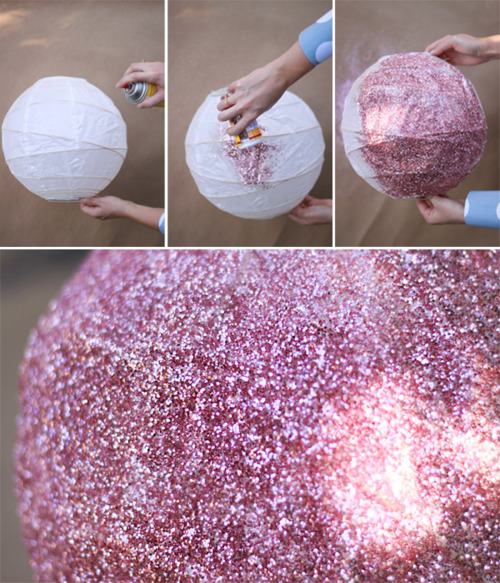
Wow all of your guests at your next big event with showstopping #DIY Glittered Paper Lanterns. So easy even a caveman could do it! : )

Materials:

  • Paper Lanterns
  • Glitter in the color of your choice
  • Glue Spray

Directions:

1. Cover the place where you will work with paper so you can reuse the glitter that will not stick on the ball again.

2. Cover the ball with the glue and immediately pour glitter on it.

3. When the first layer is dry, do another one to cover all the parts that are still appearing.

4. When you finish spray glue in the entire surface one more time to fix the glitter well.


Source: http://www.socreativethings.com/creative-paper-lantern-decorations/

Having a Beach Wedding & Trying to Keep Costs Down?

seashell candles 
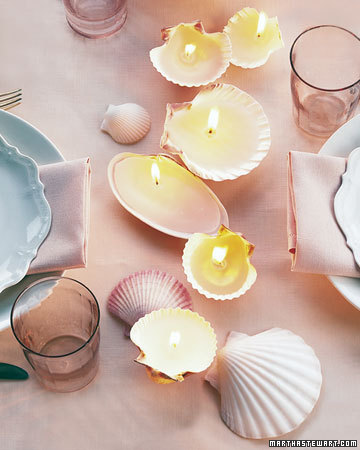
Try this #DIY Seashell Candle Idea! Make your own shell candles with craft store wicks and melted wax. Check out the step by step directions and all the materials needed for this easy #DIY project after the break!

Tools and Materials:

  • Seashells
  • Bleach
  • Water
  • Wax
  • Wicks
  • Double boiler

Candles in Seashells How-To:

1. Clean seashells in a weak solution of bleach and water. Let shells dry.

2. Melt wax in top of a double boiler.

3. After wax has melted, pour into shells until they are almost full.

4. Carefully place wicks with holders into bottom of shells.

5. Trim wicks if they don't stand upright.

6. Allow approximately 30 minutes for wax to cool completely and harden throughout.

Source: http://www.marthastewart.com/269328/candles-in-seashells


Make Dad Feel Special on Father's Day!

1_600x155 
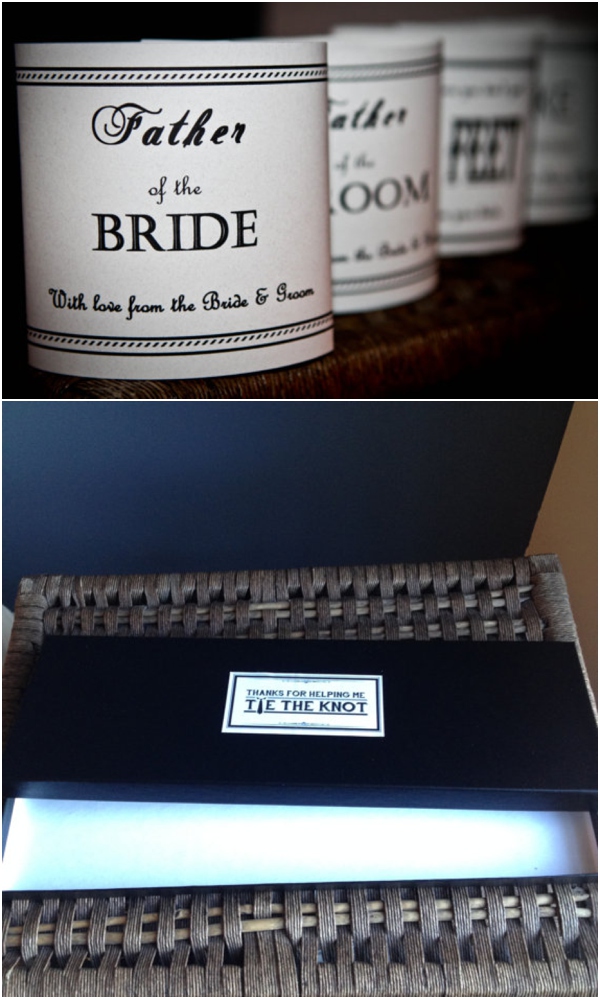
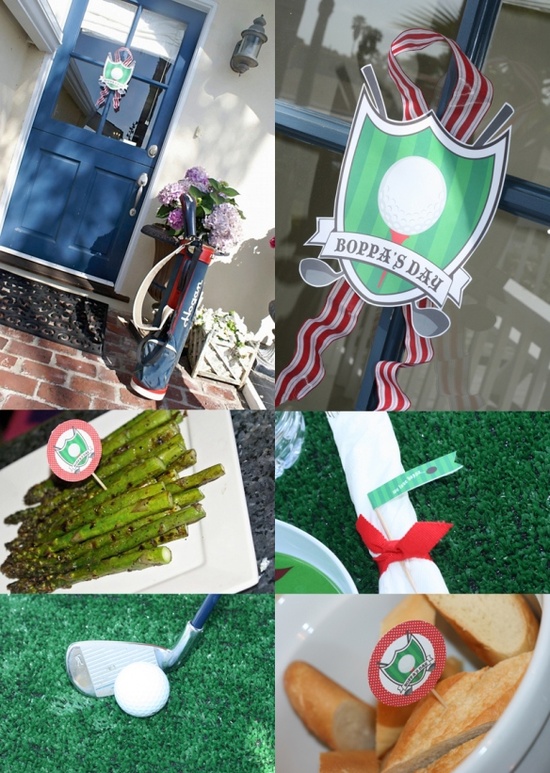
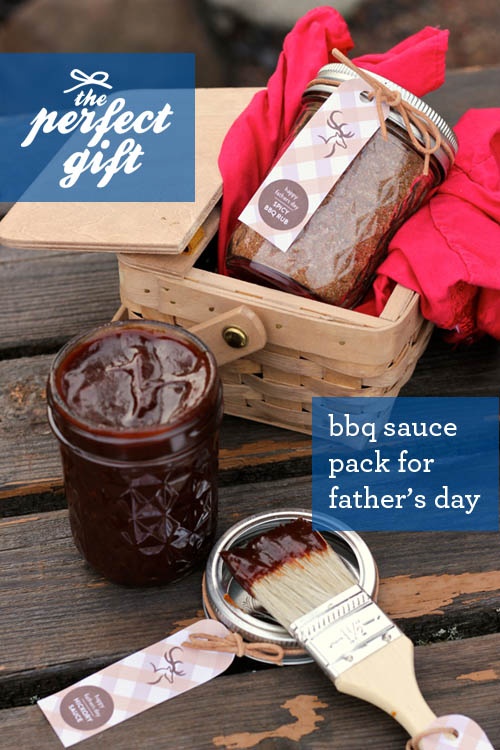
As a self-proclaimed "Daddy's Girl" I absolutely love coming up with fun ideas to celebrate Father's Day that he will appreciate! No matter where I am in my life or who I get married too, my dad will always be the first man I loved to love me back!

One of my favorite quotes is "I'm my Daddy's Girl and my Mommy's World". It perfectly describes my relationship with both of my parents that I adore. But as my dad's youngest child I know that he has a little soft spot for me and have definitely used it to my advantage :) So its only right that I give readers some ideas on how to make your Father's Day special for your big guy!

Fathers day card

1.) Honor all the father figures in your life with free eCards for Father's Day.

Fathers day party ideas

2.) Plan a fun activity or themed dinner party that he will enjoy!

Fathers day diy gift

3.) Find the Perfect Gift Idea on Pinterest. Try this Easy DIY BBQ Pack with homemade rub and sauce!

signature

DIY Cupcake Flower Bouquet

How-to-Make-a-Cupcake-Bouquet1 
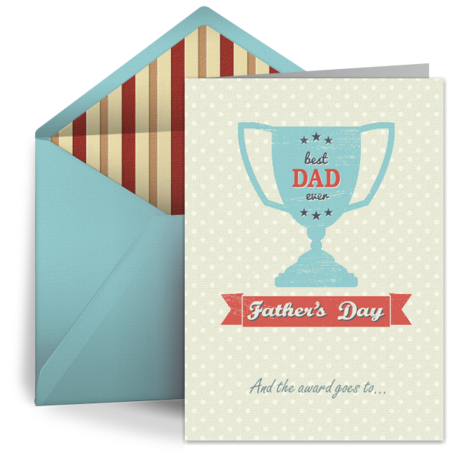
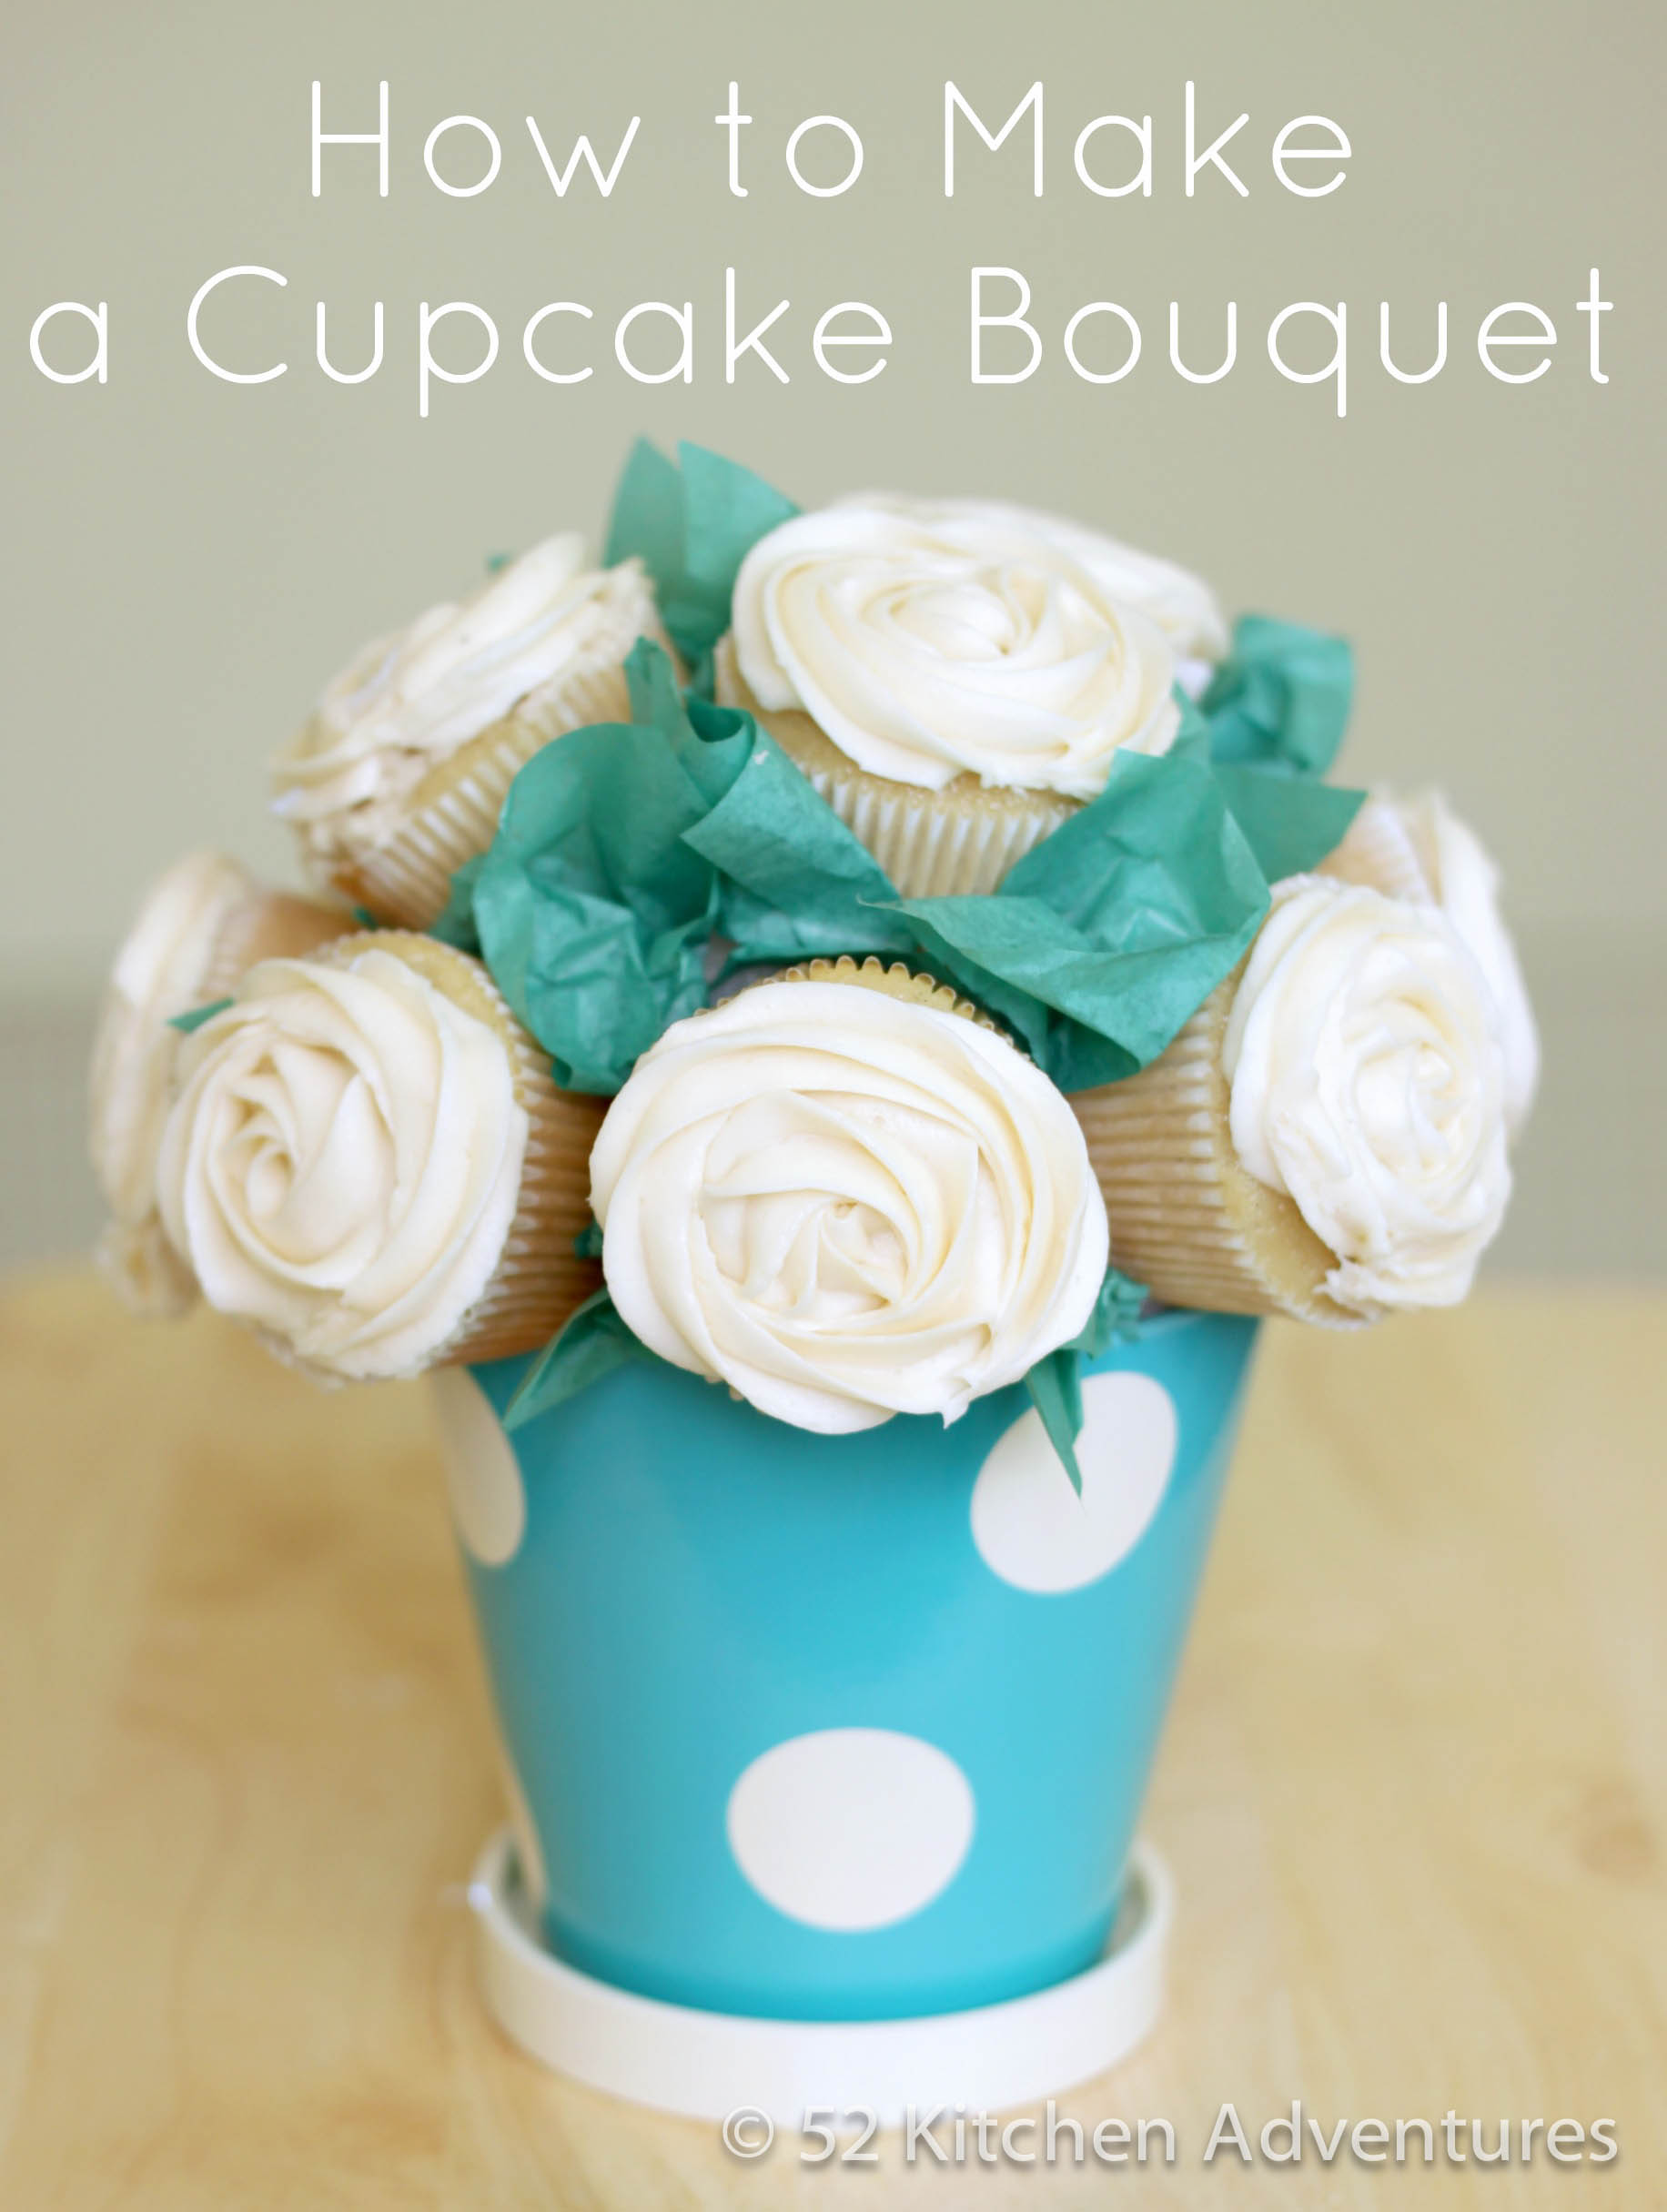
Looking for a new way to display your cupcakes at your next event? Try a cupcake bouquet! It's so easy and will make a cute and tasty centerpiece

cupcake1

Supplies Needed:

  • Cupcake Mix
  • Piping bag with 1M tip or Buy Frosting in Can with a piping tip already attached
  • Frosting
  • Flower Pot
  • Styrofoam Ball that fits inside of the flower pot
  • Toothpicks
  •  Tape
  • Green Tissue Paper

Instructions:

  1. Bake Cupcakes and Frost.
  2. Place the cupcakes in the refrigerator, so that the frosting will get firm.
  3. Place Styrofoam ball into flower pot. Place two toothpicks in each area where you want a cupcake. Make sure to place the toothpicks at a 45 degree angle on the sides to ensure that the cupcakes don't fall off after awhile
  4. Slide a cupcake onto each pair of toothpicks, adjusting toothpicks as needed to place cupcakes close together. Cover as much of the Styrofoam as you can
  5. Cut green tissue paper into small strips. Fold strips into accordions. Pinch the bottom of the accordion fold
  6. Place a piece of clear tape at the pinched part of the tissue paper and stick it to the exposed Styrofoam in between the cupcakes. Make more tissue paper “leaves” until you cover all the uncovered areas. And you are Done!!

For full instructions and pictures, check out http://www.52kitchenadventures.com/2012/04/29/how-to-make-a-cupcake-bouquet/

RECAP: DIY - St. Patrick's Day Edition

St. Patrick's Day Florals Since St. Patrick’s Day is conveniently here, I thought it would be awesome to do a DO-IT-YOURSELF mini floral arrangement with vases made from soda bottles and a CD. I know what you’re thinking…keep reading.

Whether you’re planning a gathering, a dinner with someone special or just at home drinking some Irish whiskey watching the Chicago River be transformed into the brightest, greenest river you’ve ever seen, make St. Patrick’s Day a little more special this year and add these easy to do, cost efficient and eco-friendly arrangements to your holiday décor! CHEERS!!

Step 1: Cut soda bottles to desired length

Cut Soda Bottles

Step 2: Glue CD to the cap end of one of your cut out soda bottles

Step 3: Spray paint one bottle white and the other green. Let sit for 2 hours

Step 4: Repeat step 3 for a second coat

Step 5: When bottle vases are completely dry, arrange flowers as desired

Floral Arrangement

Pictures courtesy of Afrient Media Studios (www.afrientmediastudios.com)


5 Easter DIY Party Ideas

Easter Brunch Chair Ties

 Easter Chair Decor

Step 1 Cut short pieces of flowers from bushes.

Step 2 Gather several flowers to create small bouquet

Step 3 Tie flowers together with piece of ribbon.

Step 4 Layer colored ribbon and burlap ribbon together and tie around chair backs.

Step 5 Slip flower bundle into tie.

Bell Jar with Nest Centerpiece

Bell Jar with Nest Centerpiece

Step 1 Cut moss the size of the charger plate.

Step 2 Glue in place.

Step 3 Glue some reindeer moss into nest, add eggs.

Step 4 Glue nest in center of plate, add twigs and sprig of floral.

Step 5 Add bell jar

Easter Brunch Place Cards

Easter Brunch Place Cards

Step 1 Whitewash pots with white paint (fill brush with paint and wipe almost dry on paper towel) and dry.

Step 2 Fill each pot with dry foam, then cover with reindeer moss.

Step 3 Put branch into pot.

Step 4 Use flower heads from small floral bush and hot glue to branch as shown.

Step 5 Add name written or printed on paper and wrap around branch for name placement.

Step 6 Glue few small flower heads into reindeer moss in pot.

Easter Table Centerpiece

Easter Table Centerpiece

Step 1 Use white acrylic paint to paint dots, swirls, rickrack lines on pots. Let dry.

Step 2 Cut stem from bunny pick and insert into each pot, as shown.

Easter Godiva Chocolate Egg Favors

Godiva Eggs


Step 1 Only GODIVA could make Easter eggs as delectable as this. Shop Online or Create an Assortment at a Boutique.

Step 2 My favorite are the Truffle Crème Egg Assortment which includes: chocolate ganache and marshmallow mousse in a milk chocolate shell, milk chocolate ganache and dark chocolate mousse in a dark chocolate shell, raspberry ganache and dark chocolate mousse in a dark chocolate shell, and caramel ganache and hazelnut mousse in a milk chocolate shell.

Step 3 For best results, place on tray or plate, as shown and enjoy quickly.

Hope you enjoy these easy #DIY tips to plan a festive Easter Brunch to celebrate the holiday with family gatherings, spring parties & delicious gifts to share!

Yodit Signature

Spa in a Jar for Inclement Weather

homemade sugar scrub 
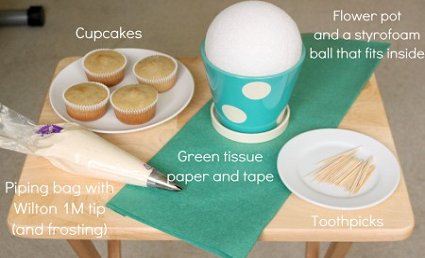
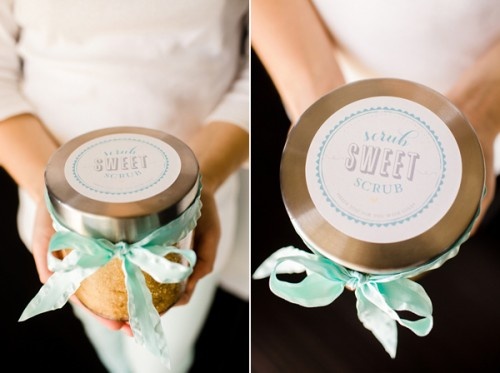
Our skin hates the colder weather in the #DMV. So if you’re stuck inside try to make the best of your time with a homemade body scrub.
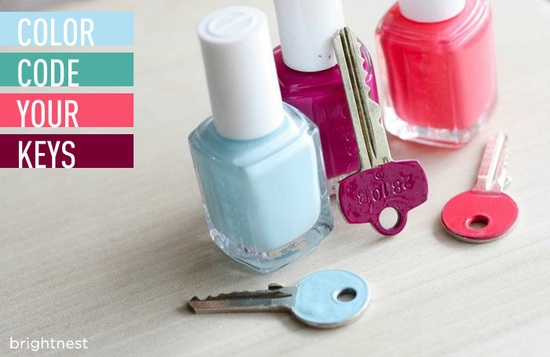
Here’s How:

1. All you need is sugar, oil, and fragrance. (We suggest using regular sugar for fine exfoliation).

2. Find your container (old baby food jar and jam jars work great).

3. Use a 2 to 1 ratio of sugar to oil. So, if you are using a half a cup of sugar in your container add 1/4 cup of oil. Extra virgin olive oil and coconut oil (warmed in microwave to make liquid) work best in my opinion.

4. Stir the two together.

5. Then add your favorite scent, whether it is peppermint oil for the holidays (great for headache relief), lavender for relaxation, or citrus for invigoration your skin will enjoy this spa day at home.

Source: Tip Junkie

Get Your Keys Organized During #Snowquester

Color code keys 1.) Color Your Keys

Hate taking forever to find your house, car, office keys when its snowing? Take 5 Minutes while indoors to color code your keys with nail polish to save time and get organized.

Here’s how:

1. Remove your keys from their chain.

2. Select your nail polish colors and decide which key should be paired with each color. You can even try some clever color associations. Is your front door red? Paint your house key cherry. Have a garden shed? Paint it green for your garden. Pool key? Blue for water!

3. Paint a layer of nail polish over the top portion of your keys. If you go over an outline by accident, use a toothpick to remove any excess polish.

4. Let your nail polish completely dry and then apply a second coat until you can’t see the metal of the key underneath.

5. Once the keys are dry, put them back to your keychain, and that’s it!

Source: BrightNest 

Life as a Bridesmaid: Bridal Shower Addition

  iDO and tiffany boxes

When I was a little girl planning my dream wedding and helping my friends plan theirs. Making sure everything was perfect and that all we needed to do was to *insert groom here*, I had no idea I would be doing arts and crafts lol. However, here I am painting boxes for my sister’s Breakfast at Tiffany’s inspired Bridal Shower.

I found the idea for some really cute centerpieces on Pinterest aka God’s gift to planners and thought this would be so easy to do myself! Of course when I say myself I mean me and my artsy friends. So I rounded up the troops and we went to work! The plan was to make Tiffany’s boxes to place on the dessert table and to collect the bride’s gift cards. We purchased everything from Michael’s and it took us about five hours to finish. Below you will find a list of everything we purchased as well as a few pictures. After the shower I will be sure to post follow up pictures so you can see how the décor turned out.

We at Favored love DIY projects. What did you make for a bridal shower? What was the theme or inspiration? Send us your pictures we would love to see them!

Materials:

  • Paper Mache Boxes set of 5
  • Celebrate it Ribbon 2 ½ in X 10 yards
  • Celebrate ir Ribbon 1 ½ in X 4 yards
  • Americana Acrylic Paint: Bahama Blue
  • Glue Gun and Glue Sticks
  • Brushes
  • Plastic or Trash Bags
  • Paper plates (to put the paint on)


supplies